Log in | Create account | 310.677.0190
The Blog

Adventure

5 Must-Visit State Parks to Add to Your Bucket List

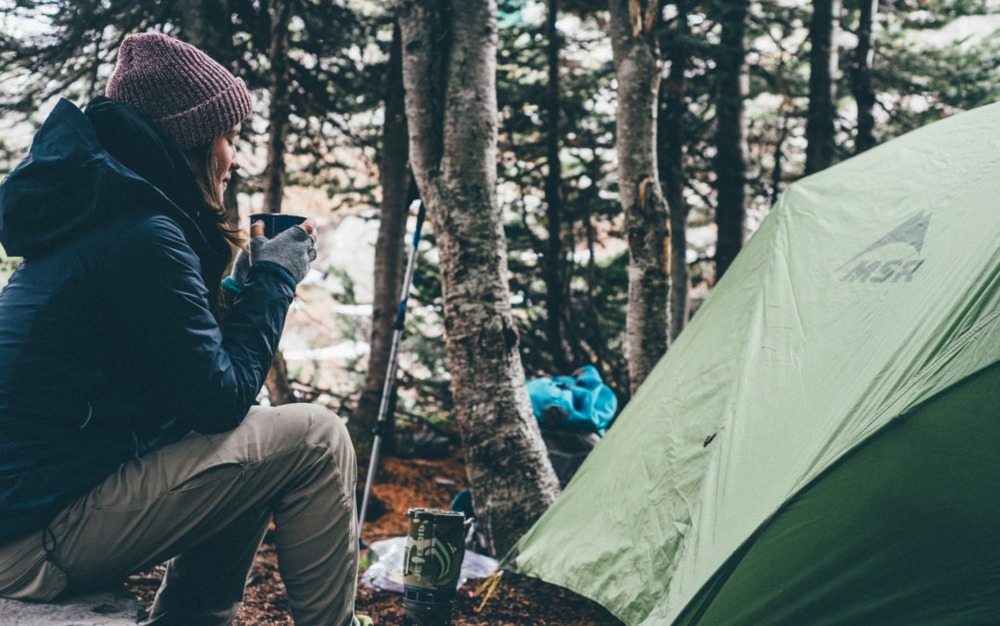
Many of us have been postponing or rescheduling travels in 2020. If we didn’t outright cancel plans, we might have restructured our vacations to focus on closer to home or outdoor locations. 

I’m sure you’ve heard of some of the most popular National Parks like the Grand Canyon and Yosemite, but did you know that there are over 6,600 state park sites in the United States? The vast array of outdoor spaces we have access to in the US is astounding and fortunate during a pandemic. That way, we can still get outside and avoid the crowds, but we have to be willing to look beyond the most well-known parks and places. 

To help you narrow it down, we put together some lesser-visited yet epically spectacular parks to add to your bucket list. 

5 Bucket List State Parks

1.   Valley of Fire State Park, Nevada

Instagram: @valley.of.fire

Location: Overton, Nevada

Best Time to Visit: October – April

Must-Do: Prospect Trail 

Camping: 72 sites (RV hookups available)

Drive through the Valley of Fire State Park, and it will make you think that perhaps you are on Mars. The unique red rock formations and indigenous history within the park have been a focal point for numerous Hollywood productions, festivals, and countless weddings. 

The stunning colors of the landscape come from the Aztec sandstone against the backdrop of limestone mountains. Beyond the geological history, this land is rich with other natural histories, including petroglyphs carved into the rocks by the Basketmaker culture, Early Pueblo, and the Paiutes. 

You can drive through the park and stop at overlooks and enjoy short walks from your car, or you can stay and camp in the first-come, first-serve campground. The campsites are spread out in rocky outcroppings giving you a sense of solitude. 

Learn more on the Valley of Fire State Park website.

2.   City of Rocks State Park, New Mexico 

Instagram: @wandering.america

Location: Deming, New Mexico

Best Time to Visit: Spring / Fall

Must-Do: Camping among the rocks

Camping: 41 sites (with showers / RV hookups)

City of Rocks State Park in New Mexico is located in the Southwest corner of the state. What makes this park unique is the volcanic rock formations. This is a great place to stop over for a relaxing overnight or weekend camping trip. 

All of the campsites are spread out among the volcanic rock formations. The park itself is relatively small, only about one square mile. So, there is some hiking available, but it is limited. If you do plan to hike, make sure to pack a Bluetooth portable speaker that fits right in the slot of your backpack.

The park’s name, City of Rocks, comes from the geological formations that make up a “city” of rock pinnacles that rise to 40 feet in height and are separated by paths. From a distance, the spread of pinnacles resembles a city in the barren Chihuahuan desert. 

Beyond camping and hiking, City of Rocks is a spectacular place for stargazing, birding, and mountain biking. Faywood Hot Springs are also within 5 miles of the park to add some relaxation and adventure to your visit. 

Learn more on the City of Rocks State Park website.

3.   Custer State Park, South Dakota

Instagram: @custerstateparksd

Location: Custer, South Dakota

Best Time to Visit: May-October

Must-Do: Kayaking on Sylvan Lake

Camping: 9 scenic campgrounds spread throughout the park

Located in the Black Hills area of South Dakota, Custer State Park offers various year-round adventures that anyone can enjoy. While they are open in the winter months, the warmer months tend to be a more popular time to visit the area. 

Depending on the activity, you will have access to several different camping experiences. All camping areas, even dry camping, will have access to a bathroom of some kind, even if they are just pit toilets. There are also cabins available for rent and a resort within the park if you are looking for a more luxurious getaway. 

Hiking, mountain biking, rock climbing, paddleboarding, and horseback riding are just a few of the most popular things to do within the park. During the winter months, many visitors enjoy snowshoeing and cross country skiing. 

Learn more on the Custer State Park website.

4.   Porcupine Mountains Wilderness State Park, Michigan 

Instagram: @porcupinemountainscvb

Location: Ontonagon, Michigan

Best Time to Visit: September – November

Must-Do: Backpacking

Camping: Backcountry sites, campgrounds, Yurt rentals, and cabins 

Michigan’s largest state park is located on the scenic Upper Peninsula and includes the Porcupine Mountains. This park is home to over 90 miles of hiking trails and 60,000 acres of land, some of which stretch along the shoreline of Lake Superior. That isn’t the only lake on the horizon, though. 

One of the most famous portions of the park is Lake of the Clouds. This lake is tucked in a valley accessible when backpacking but is visible from a few different overlooks. One of the overlooks is ADA accessible as well. Be warned that the hiking trails are notorious for being muddy, flooded, and buggy so bring proper gear. 

Other popular activities beyond backpacking and camping include fishing, boating, and biking. During the winter months, both cross country and downhill skiing are available in the area. 

Learn more on the Porcupine Mountains Wilderness State Park website.

5.   Merchants Millpond State Park, North Carolina

Instagram: @curtsuneson

Location: Gatesville, North Carolina 

Best Time to Visit: Year-Round

Must-Do: Paddling

Camping: Hike-in, paddle-in, and 20 drive-up sites

Located in the Northeast corner of North Carolina is a hidden gem of a swamp. Now, a swamp park doesn’t sound all that fun, but if you are a fan of paddling, this Southern swamp and hardwood forest is a wonderland. 

There are no entrance fees to enter the park, but you have to set up reservations for overnight stays. While you can reserve drive-up campsites, some of the most coveted spots are the ones you have to backpack or paddle to. Although there are alligators and other swamp critters around, they generally avoid visitors paddling through the waters. Be sure to respect their boundaries as well. 

Besides paddling, you can also enjoy some biking/hiking trails, fishing, and picnic areas.

Learn more on the Merchants Millpond State Park website.

5 Lesser-Traveled Spots to Check Out That Are COVID Friendly

The COVID-19 pandemic has been excellent for outdoors lovers. Bars are closed. Conventions and amusement parks are widely considered bad ideas. What’s left for simple recreation is getting outside to camp, hike, backpack, and otherwise enjoy nature and all its myriad attractions. 

However, many of our favorite outdoor locations have become crowded by groups who usually would have gone to Disneyland or stayed closer to home, sampling the local pubs and restaurants. This not only makes these destinations less enjoyable for a diehard outdoors lover, but it also makes them dangerous. A crowded campground can be just as hazardous as an overpopulated beach, from a disease vector standpoint.

Until there’s a vaccine, good sense and a spirit of adventure both dictate that we go to the lesser-known spots. Here are a few great ones from different parts of the country.

1. Pacific Northwest: Toad Lake Campground

This small patch of camping bliss is 12 miles west of I-5 near Mount Shasta. It’s one of the hike-in-only locations on the Pacific Crest Trail, a strong deterrent for casual campers. You can take your pick of developed sites with park benches and nearby toilets or hike the extra few miles for a back-country or primitive space. The farther you go, the more separated you’ll be from the crowds.

Its eponymous lake covers 23 acres surrounded by hilly forest. The shores vary from thick woods to rocky outcroppings to meadows. Boats are not permitted, making it great for fishing and swimming. There’s not much going on besides the beautiful, off-the-beaten-path nature, but that’s all we need. It might even be the perfect spot to bring out your Waterproof Speaker and lounge around for a bit.

Toad Lake Campground is open all year. Camping sites are first-come, first-served.

How to Get There

Turn onto exit 738 from I-5 near Mount Shasta, heading west. Follow Route 26/Barr Rd and turn off at the Toad Lake sign. Follow the winding road to the parking lot, then hike in following the marked trail.

2. Southwest: South Ruby Campground

A fishing and boating paradise located in the Ruby Valley National Wildlife Refuge, this campground is rarely close to as crowded as its location and amenities would suggest. It sits at 6,000 feet elevation around the coast of Ruby Lake in Nevada. Despite being a classic high desert location, its lake and marshlands attract stopover species from all around, making it one of the best bird and wildlife watching locations in the area.

The campground is located among pinyon pine and juniper, offering a shady place to pitch your tent in one of 35 sites, including one double spot and one wheelchair-accessible site. All sites have picnic tables and campfire rings, with vault toilets and running water available nearby. Besides being out of the way, the campground’s structure runs screens of trees between sites, making social distancing (and privacy) easy.

Unlike many of the out-of-the-way camping opportunities on this list, South Ruby allows boating, ATV riding, and off-road vehicles.

South Ruby Campground is open May through September, with exact dates announced one year ahead of time. You can book sites up to six months in advance.

How to Get There

Turn south off I-80 onto Route 227 near Elko. Turn right onto Route 228 and follow it past Jiggs. As the highway begins to turn north in a wide dogleg, turn right onto Ruby Valley Road and take it to the campground. If 228 turns into 767, you’ve gone too far.

3. Southeast: Linville Gorge

“The Grand Canyon of the East” is a rugged river valley in Burke County, North Carolina. The land is so steep and rough it was never harvested for timber, leaving much of it as pristine, old-growth forest rare on that side of the Mississippi River. The designated National Wilderness Area covers 12,000 acres deep forest, offering multiple rare plant species and excellent wildlife and bird viewing opportunities. The Linville River cuts a meandering path through granite walls, creating stunning falls, steep gorges, and multiple deep coves for swimming and fishing.

Trails here are not well-maintained or even clearly marked, but they offer unique, spectacular vistas to experienced hikers. Camping (with permits) is available both in established, primitive campsites and simple backwoods spaces. Motor travel is not permitted, and cellular reception is spotty. This is wilderness camping, so come prepared.

The Linville Gorge wilderness is open year-round.

How to Get There

You can access this large patch of wilderness from multiple locations, including simple roadside trailheads and a few logging roads kept open during the summer months. Aim your GPS for Spruce Pine, North Carolina. or Lenoir, North Carolina, and set off from there. Local guides can tell you what’s best and what’s least crowded at any particular time.

4. Great Plains: Wichita Mountains Wildlife Refuge

Another sizable protected area, Wichita Mountain Wilderness contains Fawn Creek Campgrounds and Doris Campground. It covers more than 59,000 acres of scrubland containing rough hills, plains, and waterways. It’s one of the oldest national wildlife refuges in the United States and home to roaming herds of bison and longhorns. Locals and road trippers visit for camping near the Visitor’s Center, but the hiking trails and boating opportunities go deep into the Refuge.

Camping opportunities are more strictly regimented here than in many other areas. Doris Campground offers hookups for RVs and pop-up tent vehicles (tents are currently prohibited). Fawn Creek Campground is reserved for organized youth groups. Everybody else is invited to enjoy backcountry camping, which is likely what you wanted anyway if you’re reading this article. All three options are by permit only, available up to three months in advance.

Wichita Mountains Wildlife Refuge is open all year, though some facilities shut down or curtail operations during winter.

How to Get There

Drive west out of Lawton on Highway 62. At Cache, turn right onto 115 and enter the area Refuge near Doris Campground. For faster access to the Visitor’s Center, continue on 62 and turn right on Route 54. Turn right onto Hwy 49, which leads you straight into the Refuge and to the Visitor’s Center.

5. New England: Cutler Coast

This area is also known as the Bold Coast, and it offers some of the most extended tracts of undeveloped coastline along the East Coast. Activity here is centered on trail hiking, including the famed Caribou Loop and Black Point Brook Loop. You can access most camping by car, but some of the best views, hiking, and wildlife viewing are only available to those willing to reach them on foot (or by paddling).

The entire area is dotted with primitive camping opportunities, all first-come, first-served. The main areas include Fairy Beach, Machias River Corridor, Donnell Pond, and Stave Island. Bear in mind that hiking is often strenuous and consists of some hazardous conditions. This getaway is not recommended for families with small children or novice hikers, making it an excellent choice for experienced outdoors lovers looking to avoid crowds during the COVID-19 pandemic.

Cutler Coast is open year-round, but the hazards increase and the foliage decreases as soon as the snow starts to fall.

How to Get There

Follow 191 northeast out of Cutler (accessible via 191 by driving south, then east out of East Machias). You’ll find multiple turn-offs and opportunities on your right as you go.

Final Thoughts

Visiting these out-of-the-way spaces is no guarantee you’ll be alone or at no risk of COVID-19 exposure. Be sure to include hand sanitizer, face masks, medical gloves, and similar items in your packing kit. For the time being, they’re as important as your cooking supplies and first aid gear.

John Bradley lives with his family of six in Oregon. They hiked and completed a big trip across the country in an RV during COVID-19.

Hiking Or Camping? Here’s How to Spot Poison Ivy and Poison Oak

Spending time outdoors is one of the best things we can do for our physical and mental health — especially right now. And if you’re looking for something invigorating to distract you from the pandemic, hiking or camping should probably be on your list.

Of course, you do need to take precautions when you participate in these outdoor activities. Although going outside can be one of the safest options right now, that doesn’t mean there won’t be hazards waiting for you. Many of those hazards occur naturally, so you’ll want to be mindful whenever you’re walking through wildlife.

As we move from summer to fall, you’ll still need to be aware of the animals and plants that can cause harm. Poison ivy and poison oak are among these dangers. It’ll behoove you to learn exactly what these plants look like so you can avoid them on the trail. That way, nothing can ruin your trip.

Poison Ivy Vs. Poison Oak: How to Tell the Difference

Both poison ivy and poison oak can cause allergic reactions (which typically show up in the form of a bodily rash) due to the urushiol they contain. In fact, 85% of Americans are allergic to poison ivy. Both plants are characterized by their lack of thorns and their three-leaf clusters. (If you’ve ever heard the expression, “leaves of three, let them be,” you’ll already be familiar with this aspect of their physical appearance). They also grow as either a vine or a bush, have red berries and white flowers, and come in a variety of sizes. They also tend to turn red in color during the fall.

However, poison ivy and poison oak also have some key differences that can help you know which plants to avoid. Poison ivy often grows close to the ground and has vines or stems that are fuzzy in appearance. Its leaves are almond-shaped and may look shiny. Poison oak has leaves that are a bit more rounded and “hairy.” They really do look similar to oak leaves. 

Avoiding and Treating Poison Ivy or Poison Oak

Knowing how to differentiate between poison ivy and poison oak can allow you to avoid making contact with these hazardous plants. But you may not always be able to rely on your quick reactions to keep you safe. When hiking, camping, or spending time in nature, you should consider wearing protective clothing to cover your skin. Long pants and long-sleeved shirts should be worn to provide a barrier between your bare skin and any plants you might brush up against.

But since reactions to poison ivy and poison oak aren’t immediate, you might realize too late that you’ve unknowingly touched them. You should first wash all exposed areas of your skin (or the affected area, if a rash has started to form) with soap and cool water. You can use cool compresses, calamine lotion, or antihistamines to treat the symptoms. Be sure to seek medical care if the rash becomes increasingly uncomfortable or if it’s accompanied by blisters, swelling, fever, or difficulty breathing. In most cases, however, the rash will eventually dissipate on its own within a couple of weeks.

Now that you know all about poison ivy and poison oak, you can hike or camp with confidence.

Best Workouts for Rock Climbing

Climbing is a sport full of diversity of muscle use, critical thinking, and experience. Whether you are just starting, an avid gym climber, or you enjoy weekend adventure outside, you may be looking for ways to improve your climbing. 

Finding workouts that not only strengthen critical muscles to push past grades is essential. Overuse is a common occurrence, especially amongst climbers just starting in the sport. We are going to take a look at a few workouts that will build up the necessary strength to improve your climbing, but that will prevent injury as well. Also, always bring along a Buckshot Pro to strap to your climbing gear for some motivational music.

Personalize Your Climbing Specific Exercise Plan

One of the best ways to improve your climbing is to climb more. Now, this should be done with some caution. If you are a beginner that is lacking in fitness overall, you will benefit most from integrating a workout routine that is not climbing based. Sticking to a base program of strength training, stretching, and cardio/aerobic exercise is the best way to prevent injury as you prepare your body for more climbing when it is ready.

A common misconception is that to be a better climber, you need to be stronger. That is not true at all. Climbing is a combination of strength and technique. Your overall strength and flexibility will only get you so far as you need to have the appropriate technique and mental stamina to push you further.

Jumping straight into hard physical training is a sure-fire way to get an injury. You have to give your tendons time to catch up to your muscles. You may be physically strong on a muscular level, but your tendons take much longer to build proper strength. If you already have a good base of strength in climbing-specific muscle groups and have built up connective tissues over time, then you will be ready to start a workout regime that is climbing-specific. 

Once you’ve begun to move past a base-level of fitness, you should then start to look at your climbing goals. Decide for yourself how much time you can devote each week to training and climbing. After that, think about the reasons behind wanting to improve your climbing ability. Are you trying to move from gym climbing to outdoor climbing? Are you planning a trip to a certain climbing destination? Will you be bouldering, trad climbing, sport climbing, alpine, etc.? These are a few questions that can help you determine the type of workouts you should focus on. For example, a boulderer will work more on power, while a multi-pitch crack climber may want to focus on technique and endurance. 

Workouts to do While Climbing 

The workout options listed below are most effective when you can stick to a routine and follow it. They can be completed in a climbing gym or outdoors, but they are most often done in a gym. Throw in some Mantas True Wireless Earbuds and get to it.

Warm-Up

It doesn’t matter the type of workout you are doing, spend a few minutes getting warmed up. Warm-ups become increasingly effective in preventing injury as you climb higher grades or pursue harder workouts. 

Some activities to include in your climbing warm-up include: 

  • 10 minutes of cardio to get the blood circulating. Biking, jump rope, jumping jacks, jogging, etc.
  • Choose dynamic stretching with plenty of rotational movement. Head rolls, windmills, walking lunges, side twists, shoulder, and hip circles, etc.
  • Pyramid Climbing. Starting with a few climbs below your grade limit and build your way up to that. For example, if you’re pushing 5.11 at your highest climbing grade, start with 5.9 or lower. Climb two of those routes, then move onto a low grade 10, then onto a higher grade 10. The key is to increase the difficulty without struggling. You shouldn’t be getting pumped or falling off of any of these routes. This progression will give your climbing-specific muscles a warm-up without making them tired. 

Endurance

Pushing your boundaries of endurance in climbing is among the best ways to improve your technique as well. As you begin to get tired while climbing, you should start to depend on your technique versus your physical strength. Do this by choosing a route of moderate difficulty to you and staying on the wall for specific periods (no hanging or one hand rests either). There should be a few technical movements on the route. 

You can choose the time period based on your current ability level. For some climbers, this may only be 10 minutes. Other climbers may push 30-minute stints. The goal here is not to do as many repetitions as possible, but to keep moving and be on the wall the entire time. Slow, precise movements and placements of hands/feet will help you hone in on technique. This focus on placement can be amplified by combining downclimbing into this time.

You can do this on the top rope, auto-belay, or traverse a bouldering wall. Be sure that you are doing these exercises within the restrictions of your gym rules and are respectful of other climbers around you. It is not recommended to do this during peak gym hours. 

As you progress in this endurance exercise, you should begin to notice that your focus on technique becomes natural, your body movement should flow more easily, and your body weight will be over your feet more often. 

Power

Power workouts can easily be done while bouldering. This is great because if you don’t have a rope partner one day, you can focus on a power movement exercise. These types of exercises will be short bursts of activity at your climbing limit, not above. Pushing power moves above your threshold over and over is an excellent way to get hurt. 

Usually, a 10-foot boulder problem will suffice here. You will want problems that vary in style. So, look for a problem or multiple problems with variations in movements like big reaches, small crimps, overhanging movements, pinches, etc. You don’t want to be making the same power move over and over in this workout. The more variation in your movement gives you more diversity in muscles worked. 

Also, keep in mind that you will need more recovery time in between sets here than during endurance. You should also give yourself more recovery time between workouts. Limit power specific workouts to once or twice a week. 

Power-Endurance Combo

A combination workout of power and endurance will come with time and as you progress in your climbing. This can be done by climbing challenging sport routes back to back or linking boulder problems at your limit. While this stage of training will take time to get to, it is easy to plateau here. It most closely simulates redpointing or an onsite on real rock. Don’t be afraid to take breaks from this workout and focus on just one or the other. Too much focus here can lead to injury. 

Cool Down

Just as you warm-up before your workout, cool down is essential as well. Most cooldowns will help to lower your heart rate and give your muscles time to stretch. Many warm-up exercises can be used to cool down as well. 

Cross-Training Exercises

Doing exercises outside of the act of climbing is often overlooked. However, it is the key to staving off injury and keeping overall health in check. Cross-training for climbing will help you isolate muscles that oppose the ones your use often while climbing. It will also improve your flexibility and endurance. 

Some great cross-training exercises include:

  • Yoga
  • Swimming, running, biking, basically any cardio 
  • Push-Ups (of all varieties)
  • Dips
  • Core exercises like planks, Russian twists, leg raises, etc
  • Wrist Curls
  • Thereaband Exercises

This is not an all-inclusive list. The main take away from these examples is that you should focus on variation and antagonistic exercises. Antagonistic exercises are the ones that focus on muscles opposite of those used when climbing to prevent injury and to correct and muscular imbalances. Primary areas to focus on include your shoulders, fingers, and knees as these get used intensely when climbing. 

Finger strength workouts are just as important. However, we did not cover these here as this article is best for beginners and intermediate climbers. As you become more advanced and your tendons are stronger, you can start to isolate exercises to your fingers.

Beginner’s Guide to Backcountry Hiking

Going out for a hike can span the time of a few hours, an entire day, or even days, weeks, and months. While hiking and backpacking are two different disciplines to prepare for, they do have many similarities. Getting off crowded metropolitan hikes and popular AllTrails picks can be both scary and extremely rewarding. Venturing into the backcountry should be built up to and takes a bit more planning than hikes you may be used to. 

As a beginner’s guide to backcountry hiking, we will be focusing specifically on hikes that can be completed in one day and require no overnights on the trail. Our goal is to give you the knowledge and reference points you need to feel confident, safe, and prepared on your upcoming backcountry hike. 

Take a Hike

Have Proper Hiking Equipment

Since you are only planning for a day hike, you will not need too much in the way of gear. While it may not seem like you need all of these things, keep in mind that you will be miles away from any roads and even further from any cities. You may not even have cell phone service for the majority of the day. So, you will need to be prepared and bring the necessary supplies. 

The most important things to bring with you when you are hiking in the backcountry include: 

  • Lightweight Daypack → If you don’t already have one, you will want to invest in a daypack that is intended for hiking. These packs are designed to be comfortable and have easy access compartments for organization of supplies. Many daypacks also come equipped with a hydration system. 
  • Hydration System and Snacks → Water is of the most essential things you will need in the backcountry. Water will also be the heaviest thing you carry, but that doesn’t mean to skimp out. Bring more than you think you need the first time you head into the backcountry. Don’t forget to pack a few trail snacks and maybe lunch if it is a long hike. 
  • Reliable Hiking Boots → The style of hiking shoes you wear will be up to you. Some hikers prefer to wear trail running shoes, while others like to have the classic ankle support high tops. Just be sure that your hiking shoes are broken in properly and have little chance of giving you blisters. Comfortable footwear is the key to an enjoyable hike! 
  • Map of Area, Guidebook, or GPS → Most hiking areas will have hard copies of maps and guidebooks, but you can also opt to download maps onto your phone. Better yet, you can take a backcountry GPS with you. If you go the digital route, keep in mind that your battery will not last forever. So, if you download maps on your phone, consider bringing a portable power bank as well. 
  • First Aid Kit → You may think that this is an unnecessary weight to carry, but better safe than sorry in the backcountry. This kit doesn’t need to be extreme, but it is good to have a few standard first aid supplies in case of an emergency on the trail. 

It can be tempting to kind of skimp on your first round of hiking gear and buy the cheapest options. While a limited budget may be a factor here, consider purchasing higher quality gear second hand or scoping out some discounts at retailers like REI to get higher quality, longer-lasting gear at a lower cost. 

Do Area Trail Research

Make sure you take time to get to know the area before you wander into the woods to get lost! This can be done in a variety of ways. You can go to old school techniques and talk to people from the area that may know the trail systems well. This can also include consulting park rangers and BLM land managers. Oftentimes, this is the most reliable way to go about things, because they will have access to the most recent trail conditions. 

Another common way of researching backcountry trails is to check out websites like All Trails, Hiking Project, and Summit Post. AllTrails can be especially helpful as you can download the app on your phone to have access to downloaded area maps when you’re hiking. 

If those maps aren’t detailed enough, you should invest in a digital or hard copy topographic map of the area. You can find these online and at many outdoor retail stores. 

Beyond knowing where you are going, you should be researching the area’s climate, wildlife, and plants. Look into the weather ahead of time to be sure that you pack accordingly. If you are hiking in a mountainous area, check for afternoon storms. Being aware of area wildlife and plant life will let you know if there are any dangerous animals or poisonous plants to avoid.

Prepare Physically for the Hike

If you are an avid hiker on familiar city trails or low key hiking trails close to town, then you are likely already in relatively good physical condition. Part of researching the area you will be hiking will include knowing the terrain to expect. 

If you are going to be hiking in a notoriously hilly area or a drastically different altitude than you are accustomed to, then you should prepare before attempting the hike. While you may be mentally ready, not being physically fit in the backcountry can be a serious danger. 

As you ramp up to your first backcountry hike, try to fit extra cardio and hiking time into your schedule. Get your legs ready at the gym by utilizing the stair stepper and doing squats. Building up your stamina and strength, will make a difference in safety, as well as how much you enjoy the hike overall. 

Leave No Trace

As you go out into the wilderness to enjoy the solitude and beauty, remember that we are sharing this Earth with other living plants and animals as well. One of the most important things you can take away from this article is to learn the Leave No Trace principles. Keep our wild places wild as we protect our outdoor spaces together!