camping

Tips for Camping in Mount Rainier National Park

Mount Rainier is an icon, not just for Washingtonians but for all outdoors enthusiasts. At 14,410 feet of elevation, Mount Rainier is one of the tallest peaks in the contiguous United States. It is also the most glaciated U.S. peak (outside of Alaska, of course): it’s the starting point for five major rivers! So it’s no wonder that camping in Mount Rainier National Park is a very popular and worthwhile adventure.

The park covers a massive 235,625 acres with over 260 miles of maintained hiking trails. Mount Rainier itself is an active volcano, and the surrounding area has wildflower meadows, forests with thousand-year-old trees, and tons of amazing wildlife. Ready to start planning your trip? Let’s dive into our top camping tips to get you started!

Plan Your Trip Thoroughly

The first thing to know about the park is that it is huge. There are five entrances, three drive-in campgrounds, two inns, and so much more. It’s essential that you know where you plan to spend your days and nights, so you don’t waste time driving around. Luckily, the National Park Service has loads of maps to help you plan, as well as information about road closures and other alerts.

Where to Camp

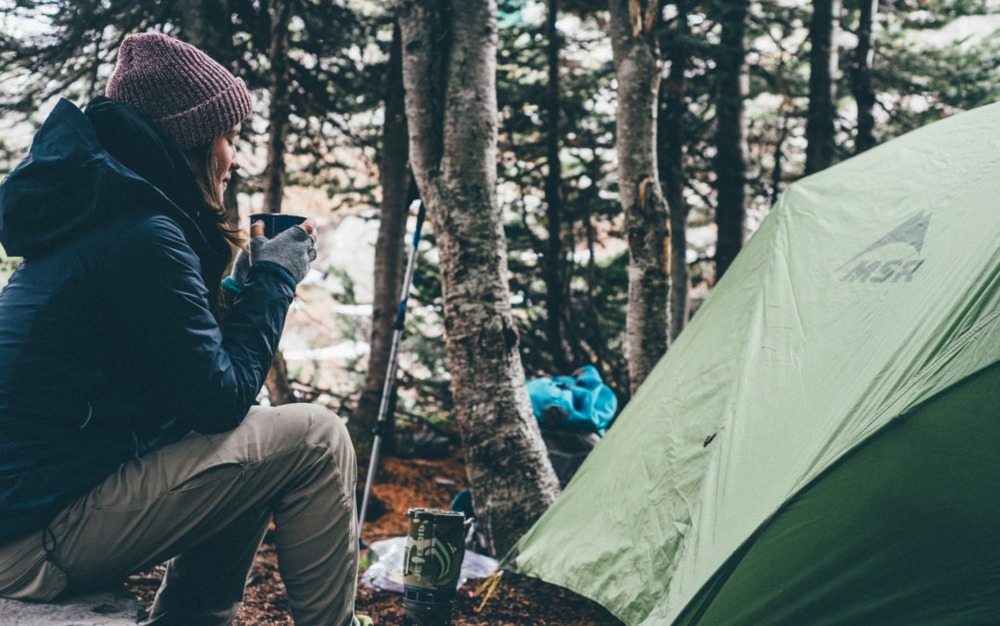
There are plenty of options for staying overnight in Mount Rainier National Park, but be sure to book early, as sites fill up fast during the summer months. For drive-in camping in Mount Rainier, two excellent options are the Ohanapecosh and Cougar Rock Campgrounds.

Ohanapecosh Campground

  • Number of sites: 188
  • Fee per night: $20
  • Attractions: Surrounded by old-growth forest and close to popular hikes
  • Amenities: water, flush toilets, fire pits, grills, picnic tables
  • Other information: Groups larger than 12 people must stay at Cougar Rock Group Campground.

Book at Recreation.gov

Cougar Rock Campground

  • Number of sites: 173
  • Fee per night: $20
  • Attractions: Lookout point of Mount Rainier, close to a wildflower meadow, access to the Wonderland Trail
  • Amenities: water, flush toilets, fire pits, grills, picnic tables

Book at Recreation.gov

Mount Rainier
Photo by Dan Purdy

Backcountry Camping in Mount Rainier NP

For backcountry camping, there are also many fantastic options. Very little of the park is accessible by car, meaning that the rest is just for wilderness camping. To get an idea of where you might want to camp, you can check out all of the trails of Mount Rainier. Once you know where you want to camp, you can refer to the Trails and Backcountry Camping Conditions to double-check that your desired site is open.

The most popular backcountry camping options, and for good reason, are along the Wonderland Trail. This 93-mile long trail encircles Mount Rainier and covers a lot of elevation gain and loss along the way. The National Parks Service recommends reserving your wilderness permit for this trail since the permits go fast. (More on that below.) 

Wonderland Trail
Photo by Danielle Plouffe

The Wonderland Trail has eighteen wilderness campsites and three non-wilderness campsites, one of which is the Cougar Rock Campground mentioned above. The best way to plan your trip is to use the Wilderness Trip Planner that shows all the campsites along the Wonderland Trail. Keep in mind that you are not allowed to camp within a quarter-mile of any trail or road. There are also three developed areas that are designated for day-use only: Longmire, Paradise, and Sunrise.

Finally, a few trails branch off from the Wonderland Trail to head higher up the mountain. The best of these is the Camp Muir Route, which ends at the Muir Public Shelter. This strenuous 9-mile round-trip trail has an elevation gain of 4,680 feet. Please note that this route is unmarked and only for experienced hikers and climbers. Before you go, be sure to check trail conditions and know your route!

Camp Muir View
View from Camp Muir: Photo by Dan Purdy

When to Go Camping in Mount Rainier NP

If you plan on camping in Mount Rainier National Park, the optimal season to visit is late spring through early fall. Average temperatures in these months hover in the 40s to 60s degrees Fahrenheit, with the best weather coming in August. Most important, though, is the average rainfall. The Pacific Northwest is notoriously drizzly, but the summer tends to be a bit drier, keeping hiking trails and campsites comfortable and safe.

That being said, if you choose to go during their peak visit times, know that you won’t be alone. Reservations book quickly, parking spots get taken, and entrance roads become congested and slow-moving. Be sure to reserve your sites and permits early. You can get up-to-date information on congestion updates via NPS Mount Rainier’s Twitter account, and be sure to check out their other summer congestion tips.

Mount Rainier Trail
Beautiful fall colors near Paradise on Mount Rainier: Photo by Danielle Plouffe

Know the (Permit) Rules

There are many different permits and reservations you could need in Mount Rainier National Park, including ones for weddings and military activities. I’ll stick to the basics and just cover what you’ll need to know to go camping in Mount Rainier. First, the single-vehicle park entrance fee is $30 unless you have a Mount Rainier Annual Park pass ($55/year) or an America the Beautiful NPS Park pass ($80/year).

Second, camping sites are $20 per night and can be reserved on Recreation.gov. Backcountry camping requires a wilderness permit, and NPS has an Early Access lottery for permits as the Wonderland Trail is so popular. 

Lastly, if you plan to hike/camp above 10,000 feet, climb, or walk on a glacier, you’ll also need to pay a Climbing Cost Recovery Fee ($52) and get a climbing permit. 

Mount Rainier Spring
Don’t forget your backcountry permits: Photo by Danielle Plouffe

Prepare for Unpredictable Weather!

Finally, one more very important tip for Mount Rainier camping is that the weather is extremely unpredictable. Even if you go in the summer, you should be prepared for it to start raining at any time. That means packing a waterproof shell and extra socks in your day bag. You should also check the weather every morning before heading out to make sure you don’t get caught in a storm.

If you plan to hike up the mountain, you’ll need to be extra prepared, as there will be different weather conditions than at lower elevations. For example, the snow around the 5,000-foot elevation mark on Mount Rainier doesn’t fully melt until July. Keep this in mind as you pack and plan your trip, as you might need heavier gear and better boots the higher up you hike on the mountain.

Final Thoughts

No matter where you stay in Mount Rainier National Park, you are sure to have an amazing time. You’ll see beautiful wildflowers, interesting wildlife, and of course, the awe-inspiring Mount Rainier. Plan ahead of time and pack well, and you’ll undoubtedly set yourself up for a memorable adventure!

Once you’ve picked out your camping spots, don’t forget to review our top camping tips to make your trip as fun as possible.

*Written by BestDraft LLC. contributor Benjamin Panico.

How to Keep Your Gear Dry While Hiking in Rain

Most of us don’t plan to go hiking in the rain, but sometimes it’s unavoidable. Besides, a little water shouldn’t stop you from a rewarding outdoor adventure. If you’re planning to hike in wet conditions, here are some precautions you can take to make sure you and your gear stay as dry as possible. Following these hiking tips will help you to have a safe trip and allow you to embrace Mother Nature in all her stormy and wonderful glory!

So, keep a close eye on the weather forecast leading up to your trip. If it looks like a wet hike, don’t forget these tips.

Keeping Yourself Dry

First and foremost, you need to keep yourself from getting soaked. If you don’t wear the proper gear and get drenched, you’ll be extremely uncomfortable. In cold enough conditions, you will also be more susceptible to hypothermia.

Waterproof Outer Layers

The first step for hiking in rain is to wear waterproof gear. An outer shell that is waterproof and windproof will keep you warm and dry underneath. When shopping for such gear, one with a hood is key. While a hat may keep your head dry, you don’t want cold rain dripping down your neck and back. I always keep a poncho in my pack for this reason. Even if I think the weather will be nice, a small and lightweight poncho protects me from an unexpected downpour.

Waterproof pants are another key ingredient for a happy hike in the rain. In my opinion, insulated waterproof pants are better than a thin shell that you wear over other pants. One solid layer is a good way to prevent cold air or water from sneaking up under a baggy shell. Also, keep an eye open for rain pants that zip up the entire leg length, allowing you to put them on without needing to take off your boots.

If you like a little music while you hike, you may want to grab a waterproof speaker like the Turtle Shell.

hiking in rain
Photo by Gabriela Palai from Pexels

Boots and Socks

Finally, waterproof hiking boots are a must. This applies to all weather conditions since you never know when you’ll find a puddle or shallow stream. As all experienced hikers know, wet feet are a surefire way to end up with blisters. There is nothing worse than hiking in wet boots, so it’s no surprise that most hiking boots are waterproof. 

But in addition to waterproof boots, you should also pack an extra pair of socks at the very least. If you are on a long camping trip, pack at least a few extra pairs and plan to dry them out every night. Allowing your feet at least twenty minutes to air dry before putting on dry socks is a great way to prevent blisters. If you’ve gotten wet on a rainy day or if your feet have gotten sweaty (as all ours do!), you will want to change socks during your lunch break.

Don’t forget to check out our Guide to Outdoor Apparel to make sure you’re prepared for any type of weather.

Keeping Your Pack Dry

It goes without saying that you can’t stay dry if all your gear gets wet. Here are a few great hiking tips for preventing even the wildest rainstorm from getting into your pack. 

rain in forrest
Photo by Raphaël Menesclou on Unsplash

Pack Liners

First, I like to pack all my gear in garbage bags when hiking in rain. There are purpose-built waterproof bags and pack liners, but garbage bags are a great budget alternative. You can bring multiple bags for different bits of gear (clean clothes, dirty clothes, sleeping bag, toiletries) so you can keep everything separate and easy to find. It’s especially important to keep your wet clothes separate from the dry ones, so you don’t accidentally ruin your dry socks. 

Dry Boxes

Another key piece of gear is a dry box. I have a small Pelican dry container that perfectly fits my phone and wallet. The sealed edges and heavy-duty latch keep my gear well protected from a rainstorm or even a dip in a lake. For a simple budget solution, head to your kitchen for some Ziplock bags. Sandwich bags are perfect for cell phones because you can keep an eye on the time and notifications through clear plastic. 

It’s essential to keep important gear in watertight containers. You want to make sure your wallet, camping permits, maps, and such stay dry. You should also have a dry box for your first aid kit and fire starters. Waterproof boxes for matches are obviously important if you plan to start a fire after the weather clears – though you might have trouble finding dry wood!

Pack Covers

Lastly, pack covers will keep your whole pack protected from the elements. While some packs come with them, many you have to buy separately. Luckily, pack covers are not too expensive, and they really are worth the cost. They are extremely lightweight, so you don’t have to worry about carrying extra pounds. Mine folds into a tiny bag that I keep on the outside of my pack for easy access should I get caught in a surprise storm.

If you buy a pack cover separately, make sure you get the correct size for your pack. The cover should fit pretty snugly around your pack. A pack cover that is too loose can come off in windy conditions. Your cover should have elastic or drawstring to tighten around your pack and keep rain from sneaking in. 

backpacking gear
Photo by mohammad alizade on Unsplash

Keeping Your Tent Dry

Hiking in rain is one thing, but camping in rainy weather adds a whole new component. When you need to camp in the rain, you’ll need to think about where to put your tent to keep you and your gear dry.

First, your tent should be on a gentle incline, with the entrance facing downhill. Having a tent on flat ground is a bad idea as the water won’t drain away, and you’ll wake up in a puddle. Also, you might think that having your tent under a tree will keep you drier, but a shady spot will prevent the sun from drying you off the next day.

Tarps and Tent Flies

Before you set up your tent, first set up your tent fly or tarp. This way, you can put your gear down out of the rain and stay dry while setting up camp. Keep in mind that a tent fly or tarp needs to be extremely taut in order to be waterproof. Wrinkles or folds in the material will allow water to pool and drip down onto you. 

Next, you absolutely need a ground tarp under your tent – often called a tent footprint. I use one even when it is totally dry just to give my tent a little extra protection from the rocks below. Again, being on higher ground and at a slight angle will allow water to drain off your tarp instead of pooling around your tent. 

rain on tent
Photo by Frame Harirak on Unsplash

Rope, Towels, and Newspaper

The final pieces of gear that are essential for hiking in rain are micro-cloth towels, a rope or string to make a clothesline, and newspaper. These are gear items that you will likely already be bringing on a hike. Okay, maybe not the newspaper, but I’ll explain why you should pack some, and it’s not for reading.

Micro-cloth towels are great for drying up after you wash your face, but they also come in handy when hiking in rainy conditions. You should always dry off your gear before putting it away to ensure your pack stays dry. It is even more important to dry the tent off before packing up since the material can soak through once folded.

A rope or string will allow you to set up a clothesline to dry key items before the next day. If you have piles of wet socks, set up a clothesline next to (not uphill from) your tent so you can dry your clothes out. If it’s still pouring out and you have limited space, you can even set up a clothesline inside your tent.

Finally, newspaper is a great material for absorbing moisture. Stuff some crumpled pages into your hiking shoes to help them fully dry out overnight.

Final Thoughts

Hiking in rain doesn’t have to be a terrible experience. If you prepare with the proper gear, you can enjoy the outdoors in any weather conditions. Hopefully, these hiking tips will keep you from canceling your next trip when the weather turns! Stay safe, stay dry, and have fun.

*This article written by BestDraft contributor Ben Panico.

Best Hiking Trails for Summer Backpackers

The United States is home to some of the world’s most diverse landscapes and best hiking trails. Every single region offers its own bounty of spectacular scenery, weather conditions, and unique challenges. But sometimes, the hardest challenge is just picking where to go! 

But we’ve got you covered; we’ve found the top hiking vacations around the country and put together your go-to guide for summer backpacking. Whether you’ve got wanderlust for snow-topped mountain views, desert heat, a tropical oasis, or wild Appalachian ponies, there’s a backpacking trip that’s perfect for you.

Glacier National Park – North Circle Loop

  • Where: Northwestern Montana
  • Length: 52 miles, strenuous
  • When to go: July-September 
  • Average Summer Temperatures: Lows: mid-30s Fahrenheit, Highs: mid-70s
Glacier National Park
Photo by Sam Solomon on Unsplash

Why Visit

This loop trail is one of the most scenic and best hiking trails in America. Expect breathtaking mountain scenes, lakes, waterfalls, active glaciers, and abundant wildlife. You’ll get to walk along 11 miles of the Highline Trail, famous both for being Glacier National Park’s most beautiful trail and for its views along the Garden Wall. The 0.25 mile stretch along the Garden Wall offers stunning views along a narrow 6-8 foot wide cliffside ledge; don’t worry, there’s a safety cable to hold onto.

Logistics

Be sure to review Glacier National Park’s trip planning resources. You’ll find maps, current trail conditions, permitting information, and park safety. Pay special attention to the permitting information; you’ll need to get your permit in person the day before your backpacking trip actually starts. 

Difficulty 

This is a strenuous hike with 12,000 feet in elevation gain. Therefore, we recommend you take 5-7 days to complete the loop. 

100 Mile Wilderness

  • Where: Monson, Maine
  • Length: 100 Miles, strenuous
  • When to Go: Late June- Early August (Early June is black fly season while August brings lots of traffic)
  • Average Summer Temperatures: Lows: mid-50s Fahrenheit, Highs: upper-70s
100 Mile wilderness
Photo by Joseph Holihan on Unsplash

Why Visit 

The 100 Mile Wilderness is the northernmost section of the Appalachian Trail (AT). This stretch of wilderness takes you through tunnels of tight pines where you may run into moose, berry bogs, craggy ridges, and jaw-dropping scenery. 

It runs from Monson, Maine, to the base of Mt. Katahdin, which is the finish line of the 2,179-mile-long AT for northbound thru-hikers. There are no places to resupply along the 100-mile long stretch, which means hikers must have enough food to last the entire 100 miles (we recommend 12 days’ worth to be on the safe side). For this reason, it’s often touted as the most challenging section of the AT and one of the best hiking vacations in the northeast. 

Logistics

This hiking vacation will take a lot of preparation as there is no trailhead or parking lot at the southern point of the trail. If you’re heading northbound, you’ll need to set up a private shuttle or hitchhike to the trail’s starting point. If you prefer to walk south, you’ll have to pay for parking and get a shuttle back up to your vehicle once you’re finished backpacking. Check out this local’s guide to a successful hiking vacation. 

Difficulty 

This is a strenuous backpacking trip. Therefore, make sure you’re comfortable with the distance and remoteness before embarking on your adventure. 

Paria Canyon – White House to Lee’s Ferry

  • Where: Utah/ Arizona border
  • Length: 38 miles, moderate
  • When to Go: April – June
  • Average Summer Temperatures:  Lows: low 40s-60s Fahrenheit, Highs: mid-60s-80s
Paria Canyon
Photo by Joshua Earle on Unsplash

Why Visit

This is an incredibly unique and not overly difficult early summer hiking vacation – you’ll lose 1,130 feet in elevation total. Backpacking the Paria Canyon involves meandering along the Paria riverbed through two giant walls of breathtaking Navajo sandstone. Along the way, you’ll experience stunning rock formations and feel like a modern-day Indiana Jones as you explore the canyon’s twists and turns. 

Logistics

Riverbed hiking comes with two crucial considerations:

  • First, you’ll have to cross the river dozens of times, so plan accordingly.
  • Second, Flash flooding in the canyon is dangerous and most likely to happen between July and September. 

Make sure you check Paria Canyon weather before your trip. If there is a chance of rain, call the Ranger Station to make sure they think it’s safe to hike. Additionally, check all permitting and camping information as soon as you start planning this backpacking trip. Carve out 4-5 days for backpacking, depending on your fitness level. 

Difficulty

This hiking vacation is moderate. You’ll experience minimal elevation changes. However, warm and dry weather should play a role in your planning, especially if you’re unaccustomed to hiking in these conditions.  

Grayson Highlands State Park

  • Where: Blue Ridge Highlands, Virginia
  • Length: 22.5 miles, strenuous
  • When to Go: Spring through Autumn
  • Average Summer Temperature: Lows: low 60s Fahrenheit, Highs: upper 70s
Grayson Highlands State Park
Image by Eric Dobson from Pixabay

Why Visit

Roaming along the Appalachian Trail over balds resembling the Scottish Highlands while passing by wild ponies calmly eating their fill: does it get any more magical? 

Although there are plenty of options for hiking the Grayson Highlands, we recommend exploring the 3-day, 2-night route we call the Massie Gap Loop. This loop will take you up and over Mount Rogers, Virginia’s highest peak. Moderate temperatures make this hiking vacation feasible anytime from the spring to fall. 

Logistics

Be prepared to pay the parking fee at Massie Gap trailhead and file a camping plan at the park office. As the directions for this particular adventure are a little more complicated, we suggest the following itinerary, and remember that the best hiking trails often take a little more planning! 

  • Park in the Backpacker’s lot
  • Begin the hike on the Appalachian Blue Spur Trail until you reach the Appalachian Trail, where you’ll head south. 
  • Two miles past Virginia’s highest peak, Mount Rogers, take a right onto Mount Rogers Trail, down to Virginia State Route 603. 
  • Cross the road to take Fairwood Valley Trail; you should come to Old Orchard Trail in a mile – follow this until you reach the AT again, where you’ll go South. 
  • You’ll come back to the Appalachian Blue Spur Trail two miles past Wise Shelter, which will take you back to the parking lot! 

Keep in mind, this is a suggested itinerary and is no replacement for your own good preparation. You still need to utilize the park map and read up on general park information to plan your trip, prepare your route, and decide where to camp. 

One final note, don’t let the blue skies fool you! The Southeast is notorious for its daily summertime thunderstorms that seem to come from nowhere. Also, bring a few layers of moisture-wicking clothing as the Grayson Highland winds can be quite chilly, even in the summer! 

Difficulty

This portion of the Appalachian Trail is considered strenuous. Therefore, plan for rugged terrain and steep elevation changes. 

Kalalau Trail

  • Where: Kauai, Hawaii
  • Length: 22 miles, moderate
  • When to Go: May – September
  • Average Summer Temperature: Lows: low-60s Fahrenheit, Highs: mid-70s
Kalalau Trail
Photo by malte on Unsplash

Why Visit

The rugged out-and-back Kalalau Trail is the only way hikers can access the world-renowned Na Pali Coast and “one of the world’s most beautiful beaches,” Kalalau Beach. The trail to get there is lush, dense, strenuous, and by far one of the best hiking trails in the country. It starts (and ends) at sea level, but a 5,000-foot elevation gain over the 22 miles makes this a formidable hike. This is undoubtedly a hiking vacation to put on the bucket list! 

Logistics

Most hikers, from average to expert experience, can make it all the way to the beach (11 miles) in a day. The length of the trip just depends on how many nights you want to camp on the beach. 

Camping on one of the world’s most beautiful beaches does not come easy. Permits are available 30 days in advance but can sell out in minutes, so be prepared to be flexible about the dates of your backpacking trip since it might take a few tries to snag a permit. If you are parking a vehicle, you’ll need a permit for that too. 

The weather in the summertime is essentially perfect, but always check the forecast to be on the safe side. If there’s rain in the forecast, there could be a chance of flash flooding at one of the river crossings. 

Difficulty

This hike’s difficulty is generally considered to be moderate. However, proper preparation and safe hiking practices are just as important as physical fitness to ensure a successful and fun adventure. 

Wrapping Up

Now that you know some of the best hiking trails in the country, all you have to do is choose where you’ll adventure next! 

As always, remember to prepare and be as safe as possible by checking the weather, wearing appropriate clothing, and knowing how to hike safely at your destination. Use our beginner’s guide to backcountry hiking as a resource when you decide which one of these awesome summer backpacking destinations is perfect for you. Have fun out there! 

*This article was written by BestDraft contributor Morgan Wilder.

Tips for camping in Joshua Tree National Park

Joshua Tree National Park is a world-renowned spot for rock climbing and one of the best places to go camping and hiking in Southern California. From the unique geological formations to the iconic Joshua Trees scattered throughout the park, there’s something for everyone in this park, no matter your interests. 

Camping in Joshua Tree may look slightly different from other National Parks, though, and the first thing you need to know is to plan ahead. Joshua Tree camping may take a bit of planning, but with a bit of extra effort, your trip with be stress-free as you experience the natural wonders of Southern California. 

To help guide you through planning a camping trip to Joshua Tree, we put together four of the top tips we have for camping in the park. 

Plan to supply water and for a lack of amenities 

Joshua Tree National Park is located in the Mojave Desert. That means water is limited. Not all campgrounds have water. The two camping areas that do have water are Black Rock and Cottonwood. Potable water is available at the Twentynine Palms visitor center, the Indian Cove ranger station, and the southern entrance station. You can also get water in the surrounding towns. 

All of the camping within the park has access to a toilet, but not all of them having flush toilets. Do not plan for full access to a bathroom with full amenities. You should bring in all food, firewood, and water (1-2 gallons per person, per day) that you need. 

Please also note that not all camping areas have cell phone reception. 

Choose a camping location based on the activities you have planned

Joshua Tree offers a wide variety of different activities to enjoy. You can plan on doing short day hikes, rock climbing, taking geological tours, wildlife viewing, and more. With so many options, it is a good idea to plan regarding the activities you want to do while you’re visiting. 

Once you’ve narrowed down your options, try to pick camping near those hikes or climbs. This may enable you to walk to the trailheads or at least shorten the drive to the parking area closest. 

If you plan on equestrian camping, this is especially important because not all Joshua Tree campsites have horse stalls. Black Rock Campground and Ryan Campground are the only areas that allow visitors to keep their horses overnight. 

Joshua Tree Dirt Road

Reservations required September-May for some areas

While there are several campsites within the park, depending on the time of year you visit, you may not be able to get a spot. That’s because much of Joshua Tree camping is first-come-first-serve. However, during the busy season (September-May), some of the campsites are reservation only. Five campsites require reservations part of the year: 

Black Rock Campground
Number of sites: 99
Fee per night: $25
Attractions: High concentration of Joshua Trees
Amenities: water, flush toilets, fire grates, dump station, phone reception
Other information: 20 horse-stall sites

Cottonwood Campground
Number of sites: 62 (3 group sites)
Fee per night: $25
Attractions: ideal for stargazing, hiking the Lost Palms Oasis and Cottonwood Springs
Amenities: dump station, water, flush toilets, fire grates
Other information: remote and usually the last campground to be filled

Indian Cove Campground
Number of sites: 101 (13 group sites)
Fee per night: $25
Attractions: climbing and Wonderland of Rocks
Amenities: vault toilets, trash/recycling, fire grates
Other information: water available 3 miles away at small ranger station

Jumbo Rocks Campground
Number of sites: 124
Fee per night: $20
Attractions: Skull Rock and other popular rock outcroppings
Amenities: dump station, vault toilets, trash/recycling
Other information: central park location

Ryan Campground 
Number of sites: 31
Fee per night: $20 ($5 for bicycles)
Attractions: hiking and climbing options nearby
Amenities: vault toilets, trash/recycling
Other information: 4 horse stall campsites, 5 bicycle campsites 

First-come-first-serve camping areas

The three camping areas that are strictly first-come-first-serve tend to have fewer sites, are less expensive, but they fill up much faster, especially on holiday weekends. 

Belle Campground
Number of sites: 18
Fee per night: $15
Attractions: closet to climbing routes at Castle Rock
Amenities: vault toilets, trash/recycling
Other information: great area for stargazing 

Hidden Valley Campground 
Number of sites: 44
Fee per night: $15
Attractions: hiking including Hidden Valley Nature Trail, Boy Scout Trail, and Keys View
Amenities: vault toilets, trash/recycling
Other information: campsites dispersed among rock outcroppings, near visitor center

White Tank Campground 
Number of sites: 15
Fee per night: $15
Attractions: Arch Rock interpretive trail (good area for kids)
Amenities: vault toilets, trash/recycling 
Other information: One of the last areas filled, good for stargazing 

Other camping options in Joshua Tree

If you are traveling with a group, some of the main campgrounds do have a few group sites, but they may fill up fast. There is one campground just for groups. Additionally, if you would like a more remote experience in the park, you can check out some of the backcountry camping. 

Sheep Pass Group Campground
Number of sites: 6
Fee per night: $50
Attractions: near Saddle Rocks and climbing crags
Amenities: vault toilets, trash/recycling 
Other information: tent only, reservations required 

Twin Tanks Backcountry Camping
Number of sites: 25
Fee per night: no fee, but backcountry permit required 
Attractions: solitude, wildlife viewing, and coyote melons
Amenities: none 
Other information: Register your vehicle when you get your permit

Joshua Tree National Park black and white photo

Frequently asked questions about Joshua Tree camping

What’s the best time of year to visit Joshua Tree?
September through May is the best time to visit the park, but it is also the busiest time of year, which is why reservations are required for some camping areas. Summer months can be upwards of 100 degrees, making it dangerous for outdoor activities. 

Are there any free or boondocking campsites near Joshua Tree?
Yes, there is some BLM land located outside the park. 

Can I bring my dog to Joshua Tree?
Yes, but they are not allowed in all hiking areas. 

Wrapping things up

We hope that this info helps you plan a safe and fun adventure in Joshua Tree National Park. Now check out this video of 17 things to do in Joshua Tree.

5 National Parks to Visit this Winter

National Parks are a wonder any time of the year, but some are even better suited during the winter months. We picked out 5 of our favorite National Parks to visit in the wintertime. Whether you’re an avid cross country skier or you want to find a place warm enough to hike and swim, there will be a National Park that fit your winter adventure needs. 

Are you looking for a few other parks to visit? Check out these five must-see State Parks.

5 National Parks to Visit This Winter

All parks are subject to closures and limited access due to winter weather conditions and COVID-19 precautions. Please check for updates on National Park websites before planning your visit. 

1.   Big Bend National Park 

Instagram: @bigbendnps

Location: Texas

Best Time to Visit: October – April

Winter Temperatures: 40-60 degrees Fahrenheit

Recommended Activity: Hiking or Camping

The winter is the best time of year to visit Big Bend National Park in Texas, making it the busiest time of year as well. Spring and Fall can also be great times to head into the park, but high Summer temperatures make it dangerous to hike and camp.

Big Bend is widely known for its camping, hiking, and backcountry backpacking. No matter your skill level or desire for adventure, there will be a trail that you and your family can enjoy. Most winter nights, even during the coldest months, will reach 40 degrees Fahrenheit. This makes it perfect for gathering around a cozy campfire and using a bluetooth speaker to sing along to campfire tunes.

If hiking isn’t your favorite activity, Big Bend also offers a wide variety of educational Ranger programs, a few scenic drives, and a must-see Fossil Discovery Exhibit

Learn more on the Big Bend National Park website.

2. Dry Tortugas National Park 

Location: Florida

Best Time to Visit: November – April 

Winter Temperatures: 50-80 degrees Fahrenheit

Recommended Activity: Bird Watching or Scuba Diving

The Dry Tortugas are just off the coast of Key West Florida, and it is a stunning location for any water lover to visit. From snorkeling, diving, fishing, boating, kayaking, and swimming, there is much to be explored in Dry Tortugas National Park. 

While the park can be visited at any time of year, it is essential to note the activities you would most like to participate in will vary from winter to summer. The Dry Tortugas essentially has two seasons: winter and summer. The winter is known for sporadic cold fronts, high winds, and choppy waters. This makes it more challenging to view ocean wildlife when snorkeling and can be unsafe for inexperienced boaters. 

However, the wintertime is the best time of year for bird watchers and tourists looking for fewer crowds. High winds tend to be more consistent from October to January, so if you’re looking for fewer people and still want to enjoy some snorkeling, February may be the best option. 

Be sure to plan your trip to the Dry Tortugas well in advance, as it is only accessible by boat or seaplane. 

Learn more on the Dry Tortugas National Park website.

3. Saguaro National Park 

Location: Arizona

Best Time to Visit: October – April

Winter Temperatures: 40-70 degrees Fahrenheit

Recommended Activity: Hiking 

Located in southern Arizona near Tuscon, Saguaro National Park is a wonderland for nature and hiking enthusiasts to enjoy. Like much of southern Arizona, the winter is the best and busiest time to enjoy outdoor activities. Saguaro National Park is well known for its hiking, and of course, the density of Saguaro cacti spread around the park and surrounding areas. 

Beyond incredible desert vistas while hiking or backpacking and the diverse flora and fauna, visitors can also enjoy the natural history by visiting area petroglyphs. 

If you’d like to camp in the park, make reservations early as camping spots fill up fast. You can make reservations as early as two months in advance. Be advised that hours and accessibility may differ due to COVID-19. 

Finally, a must mention for any trip in the Arizona desert is to take some time to view the sunset. Although sunsets are spectacular in most outdoor spaces, the sunsets seem richer due to the landscape’s natural warm coloring.

Learn more on the Saguaro National Park website.

4. Bryce Canyon National Park 

Instagram: @brycecanyonnps_gov

Location: Utah

Best Time to Visit: May – September

Winter Temperatures: 10-40 degrees Fahrenheit

Recommended Activity: Snowshoeing or Cross-country Skiing 

Although the winter is not deemed the “best” time of year to visit Bryce Canyon National Park, there is plenty to do for winter adventurers. If you are a lover of all things snowshoeing and cross country skiing, Bryce Canyon is a must-see park to put on your list. 

The winter is the least traveled by humans in the park, making it optimal for wildlife viewing and stunning nature photography. If you plan a visit to the park, don’t fret that daylight hours are shorter either, because the night skies in Bryce are an unforgettable sight. Study up on your winter constellations before you come, and enjoy a snowy night hike amongst the stars. 

Learn more on the Bryce Canyon National Park website.

5. Acadia National Park 

Location: Maine

Best Time to Visit: August – October

Winter Temperatures: 10-35 degrees Fahrenheit

Recommended Activity: Cross-Country Skiing 

The last park on our list is a bit further north in Maine. Acadia National Park is well known for its Fall colors, making Autumn the most popular season to visit. Still, if cross country skiing is a favorite activity of yours, then this is one of the best places to go this winter. 

Acadia’s backcountry ski trails are hard to beat since there are around 45 miles of groomed trails. Beyond that, you are also allowed to ski on unplowed park roads. Be warned that snowmobiles can also use the roads for travel though. 

Acadia National Park is also a stunning place to go for a winter hike or an afternoon snowshoe. 

Learn more on the Acadia National Park website.

Best Hobbies to Pick Up During the Pandemic

These are challenging times for everyone. It helps to have a hobby to occupy your mind and your time. The situation going on around us is unprecedented, but it’s full of opportunities if you know where to look. Rather than sitting around the house feeling bored, lonely, and worried, why not pick up a hobby? You can enrich your mind and entertain yourself, as well as your family. All you have to do is select the right activity for you. Here are some ideas to get you started.

Binge-Watch Your Faves

You might be stuck inside, but that doesn’t mean that there’s nothing to do. During times like these, sometimes you need to do something soothing that will not only take your mind off of what’s happening, but will also numb you a bit and take you out of the situation. For that reason, binge-watching movies and TV shows might be your best bet. You can turn it into something fun, even something that has a purpose. For example, this is your opportunity to catch up on all the shows you always wanted to watch but never had time to enjoy. You could also sit down to watch an entire movie series, such as the Lord of the Rings trilogy or all of the Marvel movies—in order. To make it more enjoyable, consider Facetiming or Zooming with a group of friends while you watch.

Pick Up a Book

Speaking of immersing yourself in different worlds, all you need is a book to transport yourself to a faraway place. At the very least, you can get lost in a world where the pandemic isn’t happening. It’s hard for busy adults to find time to read even when they enjoy doing so. Right now, you have no excuses and no other commitments. You’re stuck at home, so there’s no reason not to pick up a book that you’ve been dying to read. Then again, why not reread your old favorites? Books and stories are comforting, and comfort is exactly what we all need right now.

Bust Out the Crayons

Soothing activities are unquestionably some of the best hobbies to start right now. Plenty of adults have embraced some of their childhood favorites because those activities give them a sense of calm and help them to believe that everything genuinely will be okay. Whether you want to color with crayons, colored pencils, or watercolors, take a look at some adult coloring books to see what strikes your fancy. In addition to funny adult coloring books with risqué pictures and naughty words, you can also pick out books with intricate designs and breathtaking scenes.

Get to the Kitchen

Throughout the course of the pandemic, people have understandably been cooking at home more often. Many restaurants are open for delivery, takeout, and social distanced seating, but with the economy the way it is and with growing numbers of furloughs and layoffs, cooking at home is often the more practical choice. Why not turn it into an adventure? Try your hand at gourmet meals that you’ve never attempted. Experiment with baking, chocolate, or pastries. You never know, your true talents may lie in the kitchen.

Stay Active

You may be wary of going to the gym, if they’re even open in your area. That’s entirely understandable. Fortunately, that doesn’t mean that you can’t enjoy physical activities. Turn your home into a gym. There’s a wide world of videos and tutorials out there that can show you exactly what to do using basic equipment. You don’t need to spend a fortune to work out at home. Simply going for a local hike or doing yoga in the backyard is excellent for your mental and physical health. You can also opt to go for a run, but don’t forget your earbuds to entertain yourself while you’re on the go.

Choose a Craft

Are you into arts and crafts? Maybe it’s time to start crafting. There are all sorts of hobbies to learn. For instance, have you ever considered crocheting or knitting? You can order the supplies, have them sent to your home, and look up video tutorials to get started. The same goes for painting, felting, jewelry making, or woodworking. Just think about an artsy hobby that you’ve always wanted to try and jump right into it.

Turn Your Thumbs Green

Have you ever considered gardening? It’s a calming activity, it serves a practical purpose, and it gives you the chance to nurture something and watch it grow. It may not be the right season for gardening where you are, but that’s okay. You can set up an indoor garden, instead. Consider creating a container garden in your sunroom or treat yourself to an herb garden starter kit. You can grow herbs right in your kitchen. Not only are they beautiful and fragrant, but they can elevate all of your cooking endeavors, as well.

This is by no means a comprehensive list of hobbies. You may decide that it’s the perfect time for a few DIY home improvements. Learning a new language may be right up your alley. What hobby interests you the most?


5 Lesser-Traveled Spots to Check Out That Are COVID Friendly

The COVID-19 pandemic has been excellent for outdoors lovers. Bars are closed. Conventions and amusement parks are widely considered bad ideas. What’s left for simple recreation is getting outside to camp, hike, backpack, and otherwise enjoy nature and all its myriad attractions. 

However, many of our favorite outdoor locations have become crowded by groups who usually would have gone to Disneyland or stayed closer to home, sampling the local pubs and restaurants. This not only makes these destinations less enjoyable for a diehard outdoors lover, but it also makes them dangerous. A crowded campground can be just as hazardous as an overpopulated beach, from a disease vector standpoint.

Until there’s a vaccine, good sense and a spirit of adventure both dictate that we go to the lesser-known spots. Here are a few great ones from different parts of the country.

1. Pacific Northwest: Toad Lake Campground

This small patch of camping bliss is 12 miles west of I-5 near Mount Shasta. It’s one of the hike-in-only locations on the Pacific Crest Trail, a strong deterrent for casual campers. You can take your pick of developed sites with park benches and nearby toilets or hike the extra few miles for a back-country or primitive space. The farther you go, the more separated you’ll be from the crowds.

Its eponymous lake covers 23 acres surrounded by hilly forest. The shores vary from thick woods to rocky outcroppings to meadows. Boats are not permitted, making it great for fishing and swimming. There’s not much going on besides the beautiful, off-the-beaten-path nature, but that’s all we need. It might even be the perfect spot to bring out your Waterproof Speaker and lounge around for a bit.

Toad Lake Campground is open all year. Camping sites are first-come, first-served.

How to Get There

Turn onto exit 738 from I-5 near Mount Shasta, heading west. Follow Route 26/Barr Rd and turn off at the Toad Lake sign. Follow the winding road to the parking lot, then hike in following the marked trail.

2. Southwest: South Ruby Campground

A fishing and boating paradise located in the Ruby Valley National Wildlife Refuge, this campground is rarely close to as crowded as its location and amenities would suggest. It sits at 6,000 feet elevation around the coast of Ruby Lake in Nevada. Despite being a classic high desert location, its lake and marshlands attract stopover species from all around, making it one of the best bird and wildlife watching locations in the area.

The campground is located among pinyon pine and juniper, offering a shady place to pitch your tent in one of 35 sites, including one double spot and one wheelchair-accessible site. All sites have picnic tables and campfire rings, with vault toilets and running water available nearby. Besides being out of the way, the campground’s structure runs screens of trees between sites, making social distancing (and privacy) easy.

Unlike many of the out-of-the-way camping opportunities on this list, South Ruby allows boating, ATV riding, and off-road vehicles.

South Ruby Campground is open May through September, with exact dates announced one year ahead of time. You can book sites up to six months in advance.

How to Get There

Turn south off I-80 onto Route 227 near Elko. Turn right onto Route 228 and follow it past Jiggs. As the highway begins to turn north in a wide dogleg, turn right onto Ruby Valley Road and take it to the campground. If 228 turns into 767, you’ve gone too far.

3. Southeast: Linville Gorge

“The Grand Canyon of the East” is a rugged river valley in Burke County, North Carolina. The land is so steep and rough it was never harvested for timber, leaving much of it as pristine, old-growth forest rare on that side of the Mississippi River. The designated National Wilderness Area covers 12,000 acres deep forest, offering multiple rare plant species and excellent wildlife and bird viewing opportunities. The Linville River cuts a meandering path through granite walls, creating stunning falls, steep gorges, and multiple deep coves for swimming and fishing.

Trails here are not well-maintained or even clearly marked, but they offer unique, spectacular vistas to experienced hikers. Camping (with permits) is available both in established, primitive campsites and simple backwoods spaces. Motor travel is not permitted, and cellular reception is spotty. This is wilderness camping, so come prepared.

The Linville Gorge wilderness is open year-round.

How to Get There

You can access this large patch of wilderness from multiple locations, including simple roadside trailheads and a few logging roads kept open during the summer months. Aim your GPS for Spruce Pine, North Carolina. or Lenoir, North Carolina, and set off from there. Local guides can tell you what’s best and what’s least crowded at any particular time.

4. Great Plains: Wichita Mountains Wildlife Refuge

Another sizable protected area, Wichita Mountain Wilderness contains Fawn Creek Campgrounds and Doris Campground. It covers more than 59,000 acres of scrubland containing rough hills, plains, and waterways. It’s one of the oldest national wildlife refuges in the United States and home to roaming herds of bison and longhorns. Locals and road trippers visit for camping near the Visitor’s Center, but the hiking trails and boating opportunities go deep into the Refuge.

Camping opportunities are more strictly regimented here than in many other areas. Doris Campground offers hookups for RVs and pop-up tent vehicles (tents are currently prohibited). Fawn Creek Campground is reserved for organized youth groups. Everybody else is invited to enjoy backcountry camping, which is likely what you wanted anyway if you’re reading this article. All three options are by permit only, available up to three months in advance.

Wichita Mountains Wildlife Refuge is open all year, though some facilities shut down or curtail operations during winter.

How to Get There

Drive west out of Lawton on Highway 62. At Cache, turn right onto 115 and enter the area Refuge near Doris Campground. For faster access to the Visitor’s Center, continue on 62 and turn right on Route 54. Turn right onto Hwy 49, which leads you straight into the Refuge and to the Visitor’s Center.

5. New England: Cutler Coast

This area is also known as the Bold Coast, and it offers some of the most extended tracts of undeveloped coastline along the East Coast. Activity here is centered on trail hiking, including the famed Caribou Loop and Black Point Brook Loop. You can access most camping by car, but some of the best views, hiking, and wildlife viewing are only available to those willing to reach them on foot (or by paddling).

The entire area is dotted with primitive camping opportunities, all first-come, first-served. The main areas include Fairy Beach, Machias River Corridor, Donnell Pond, and Stave Island. Bear in mind that hiking is often strenuous and consists of some hazardous conditions. This getaway is not recommended for families with small children or novice hikers, making it an excellent choice for experienced outdoors lovers looking to avoid crowds during the COVID-19 pandemic.

Cutler Coast is open year-round, but the hazards increase and the foliage decreases as soon as the snow starts to fall.

How to Get There

Follow 191 northeast out of Cutler (accessible via 191 by driving south, then east out of East Machias). You’ll find multiple turn-offs and opportunities on your right as you go.

Final Thoughts

Visiting these out-of-the-way spaces is no guarantee you’ll be alone or at no risk of COVID-19 exposure. Be sure to include hand sanitizer, face masks, medical gloves, and similar items in your packing kit. For the time being, they’re as important as your cooking supplies and first aid gear.

John Bradley lives with his family of six in Oregon. They hiked and completed a big trip across the country in an RV during COVID-19.

Hiking Or Camping? Here’s How to Spot Poison Ivy and Poison Oak

Spending time outdoors is one of the best things we can do for our physical and mental health — especially right now. And if you’re looking for something invigorating to distract you from the pandemic, hiking or camping should probably be on your list.

Of course, you do need to take precautions when you participate in these outdoor activities. Although going outside can be one of the safest options right now, that doesn’t mean there won’t be hazards waiting for you. Many of those hazards occur naturally, so you’ll want to be mindful whenever you’re walking through wildlife.

As we move from summer to fall, you’ll still need to be aware of the animals and plants that can cause harm. Poison ivy and poison oak are among these dangers. It’ll behoove you to learn exactly what these plants look like so you can avoid them on the trail. That way, nothing can ruin your trip.

Poison Ivy Vs. Poison Oak: How to Tell the Difference

Both poison ivy and poison oak can cause allergic reactions (which typically show up in the form of a bodily rash) due to the urushiol they contain. In fact, 85% of Americans are allergic to poison ivy. Both plants are characterized by their lack of thorns and their three-leaf clusters. (If you’ve ever heard the expression, “leaves of three, let them be,” you’ll already be familiar with this aspect of their physical appearance). They also grow as either a vine or a bush, have red berries and white flowers, and come in a variety of sizes. They also tend to turn red in color during the fall.

However, poison ivy and poison oak also have some key differences that can help you know which plants to avoid. Poison ivy often grows close to the ground and has vines or stems that are fuzzy in appearance. Its leaves are almond-shaped and may look shiny. Poison oak has leaves that are a bit more rounded and “hairy.” They really do look similar to oak leaves. 

Avoiding and Treating Poison Ivy or Poison Oak

Knowing how to differentiate between poison ivy and poison oak can allow you to avoid making contact with these hazardous plants. But you may not always be able to rely on your quick reactions to keep you safe. When hiking, camping, or spending time in nature, you should consider wearing protective clothing to cover your skin. Long pants and long-sleeved shirts should be worn to provide a barrier between your bare skin and any plants you might brush up against.

But since reactions to poison ivy and poison oak aren’t immediate, you might realize too late that you’ve unknowingly touched them. You should first wash all exposed areas of your skin (or the affected area, if a rash has started to form) with soap and cool water. You can use cool compresses, calamine lotion, or antihistamines to treat the symptoms. Be sure to seek medical care if the rash becomes increasingly uncomfortable or if it’s accompanied by blisters, swelling, fever, or difficulty breathing. In most cases, however, the rash will eventually dissipate on its own within a couple of weeks.

Now that you know all about poison ivy and poison oak, you can hike or camp with confidence.

Beginner’s Guide to Backcountry Hiking

Going out for a hike can span the time of a few hours, an entire day, or even days, weeks, and months. While hiking and backpacking are two different disciplines to prepare for, they do have many similarities. Getting off crowded metropolitan hikes and popular AllTrails picks can be both scary and extremely rewarding. Venturing into the backcountry should be built up to and takes a bit more planning than hikes you may be used to. 

As a beginner’s guide to backcountry hiking, we will be focusing specifically on hikes that can be completed in one day and require no overnights on the trail. Our goal is to give you the knowledge and reference points you need to feel confident, safe, and prepared on your upcoming backcountry hike. 

Take a Hike

Have Proper Hiking Equipment

Since you are only planning for a day hike, you will not need too much in the way of gear. While it may not seem like you need all of these things, keep in mind that you will be miles away from any roads and even further from any cities. You may not even have cell phone service for the majority of the day. So, you will need to be prepared and bring the necessary supplies. 

The most important things to bring with you when you are hiking in the backcountry include: 

  • Lightweight Daypack → If you don’t already have one, you will want to invest in a daypack that is intended for hiking. These packs are designed to be comfortable and have easy access compartments for organization of supplies. Many daypacks also come equipped with a hydration system. 
  • Hydration System and Snacks → Water is of the most essential things you will need in the backcountry. Water will also be the heaviest thing you carry, but that doesn’t mean to skimp out. Bring more than you think you need the first time you head into the backcountry. Don’t forget to pack a few trail snacks and maybe lunch if it is a long hike. 
  • Reliable Hiking Boots → The style of hiking shoes you wear will be up to you. Some hikers prefer to wear trail running shoes, while others like to have the classic ankle support high tops. Just be sure that your hiking shoes are broken in properly and have little chance of giving you blisters. Comfortable footwear is the key to an enjoyable hike! 
  • Map of Area, Guidebook, or GPS → Most hiking areas will have hard copies of maps and guidebooks, but you can also opt to download maps onto your phone. Better yet, you can take a backcountry GPS with you. If you go the digital route, keep in mind that your battery will not last forever. So, if you download maps on your phone, consider bringing a portable power bank as well. 
  • First Aid Kit → You may think that this is an unnecessary weight to carry, but better safe than sorry in the backcountry. This kit doesn’t need to be extreme, but it is good to have a few standard first aid supplies in case of an emergency on the trail. 

It can be tempting to kind of skimp on your first round of hiking gear and buy the cheapest options. While a limited budget may be a factor here, consider purchasing higher quality gear second hand or scoping out some discounts at retailers like REI to get higher quality, longer-lasting gear at a lower cost. 

Do Area Trail Research

Make sure you take time to get to know the area before you wander into the woods to get lost! This can be done in a variety of ways. You can go to old school techniques and talk to people from the area that may know the trail systems well. This can also include consulting park rangers and BLM land managers. Oftentimes, this is the most reliable way to go about things, because they will have access to the most recent trail conditions. 

Another common way of researching backcountry trails is to check out websites like All Trails, Hiking Project, and Summit Post. AllTrails can be especially helpful as you can download the app on your phone to have access to downloaded area maps when you’re hiking. 

If those maps aren’t detailed enough, you should invest in a digital or hard copy topographic map of the area. You can find these online and at many outdoor retail stores. 

Beyond knowing where you are going, you should be researching the area’s climate, wildlife, and plants. Look into the weather ahead of time to be sure that you pack accordingly. If you are hiking in a mountainous area, check for afternoon storms. Being aware of area wildlife and plant life will let you know if there are any dangerous animals or poisonous plants to avoid.

Prepare Physically for the Hike

If you are an avid hiker on familiar city trails or low key hiking trails close to town, then you are likely already in relatively good physical condition. Part of researching the area you will be hiking will include knowing the terrain to expect. 

If you are going to be hiking in a notoriously hilly area or a drastically different altitude than you are accustomed to, then you should prepare before attempting the hike. While you may be mentally ready, not being physically fit in the backcountry can be a serious danger. 

As you ramp up to your first backcountry hike, try to fit extra cardio and hiking time into your schedule. Get your legs ready at the gym by utilizing the stair stepper and doing squats. Building up your stamina and strength, will make a difference in safety, as well as how much you enjoy the hike overall. 

Leave No Trace

As you go out into the wilderness to enjoy the solitude and beauty, remember that we are sharing this Earth with other living plants and animals as well. One of the most important things you can take away from this article is to learn the Leave No Trace principles. Keep our wild places wild as we protect our outdoor spaces together!